DIY Mother’s Day Card with Paper Roses – How to Make a Lovely Gift
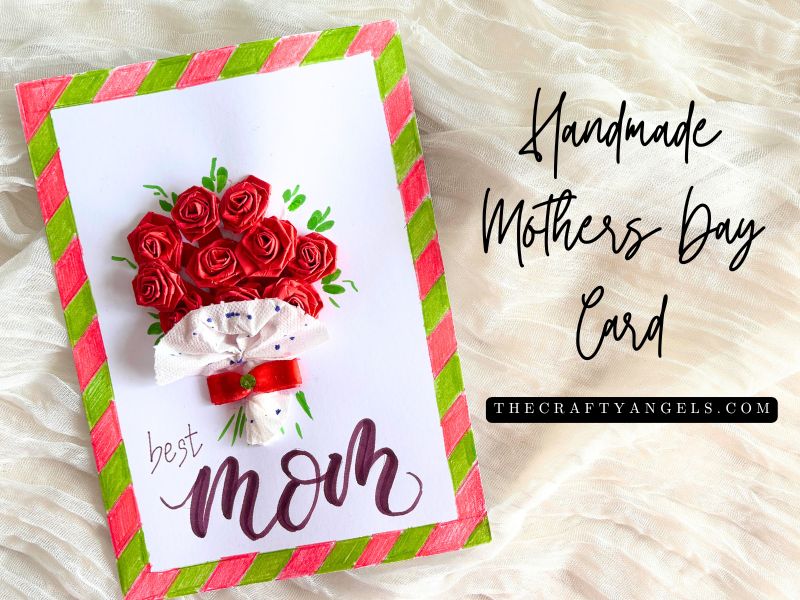
Mother’s Day is a beautiful time to celebrate the incredible women in our lives, and what better way to do that than with a heartfelt DIY Mother’s Day card with paper roses? Handmade cards hold a special charm because they are personal, thoughtful, and creative. In today’s tutorial, I’ll walk you through making a lovely bouquet of paper roses, arranged on a card that’s sure to make your mom smile. This step-by-step guide is beginner-friendly and only requires basic materials, making it a fun project for all ages. This is also covered in a Youtube tutorial, if you love watching tutorials in video format.
Materials You Need for Your DIY Mother’s Day Card with Paper Roses
Before we dive into crafting, gather the following materials:
- A4 size colored paper (around 80gsm, like standard printer paper)
- Scissors
- Craft glue or a glue stick
- Thick cardstock (A4 folded to A5 size)
- Tissue paper (for wrapping the bouquet)
- Small decorative bow (optional but recommended)
- Colored pencils, markers, or brush pens
- A ruler and pencil for precision
Step 1: Preparing the Paper Strips
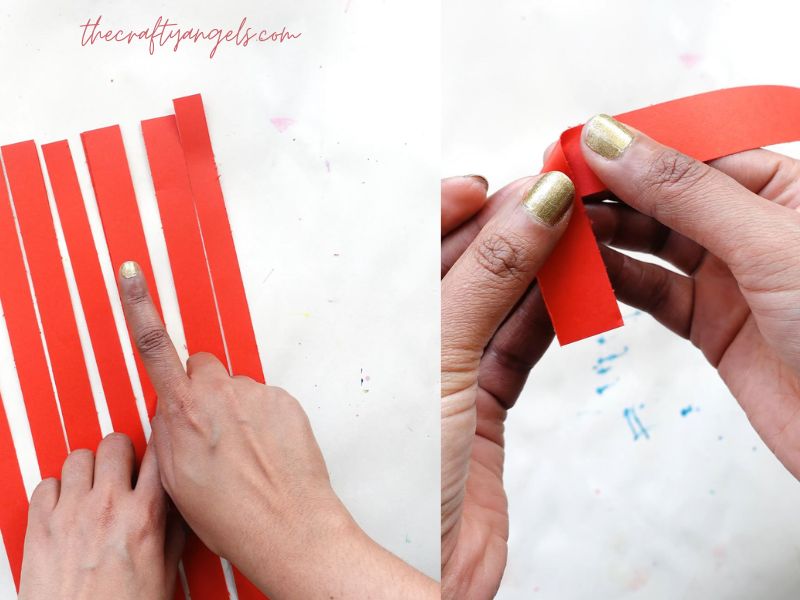
To start creating your DIY Mother’s Day card with paper roses, take your colored paper and cut it into 1-inch wide strips along the shorter side of the A4 sheet. Each strip will form one rose. For a full bouquet, you’ll want to prepare around 8 to 10 strips. Using lightweight paper (about 80gsm) is ideal because it’s easy to fold and twist, but still holds its shape well.
Step 2: Folding and Twisting the Paper Roses
Now it’s time to transform your strips into beautiful paper roses. Here’s how:
- Take one strip and fold it lengthwise, turning it into a half-inch wide strip.
- Leave about an inch at the end and fold the strip at a 90-degree angle to create an L-shape.
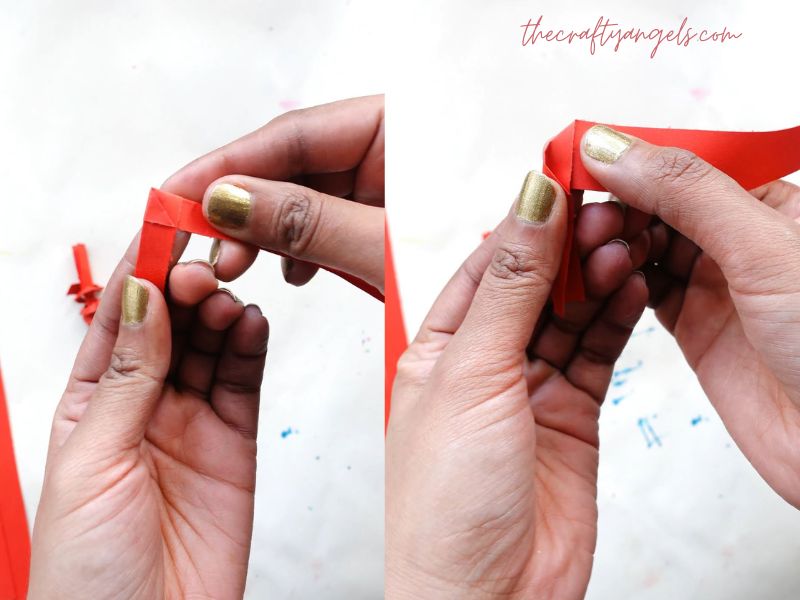
- Fold the shorter side of the L over the longer side to start forming a little bud at the center—this will be the core of your rose.
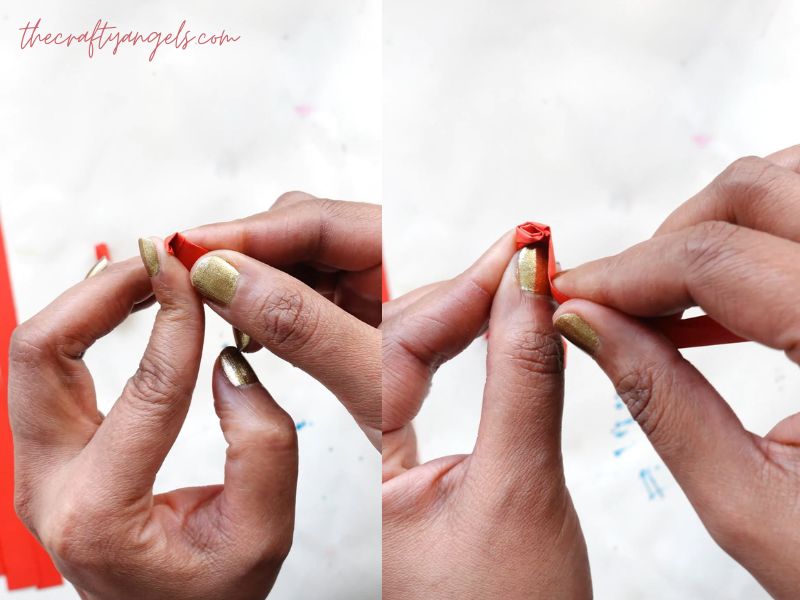
- Begin twisting and folding the longer strip around the center bud, turning it slightly with each fold to mimic natural rose petals. The twisting angle doesn’t have to be perfect—you’ll get the hang of it as you go!
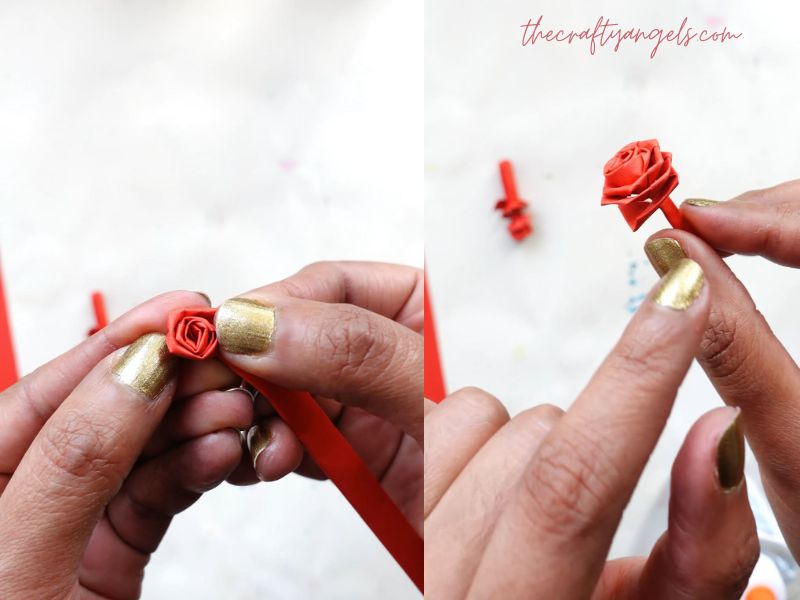
If your first rose isn’t perfect, don’t worry. The more you practice, the more consistent and beautiful your paper roses will become. When your rose reaches a nice size, trim off any excess and glue the end to secure the flower. Repeat this process until you have 8 to 10 roses ready for your bouquet.
Step 3: Assembling Your Paper Rose Bouquet Card
For the next part of your DIY Mother’s Day card with paper roses, you’ll assemble the bouquet:
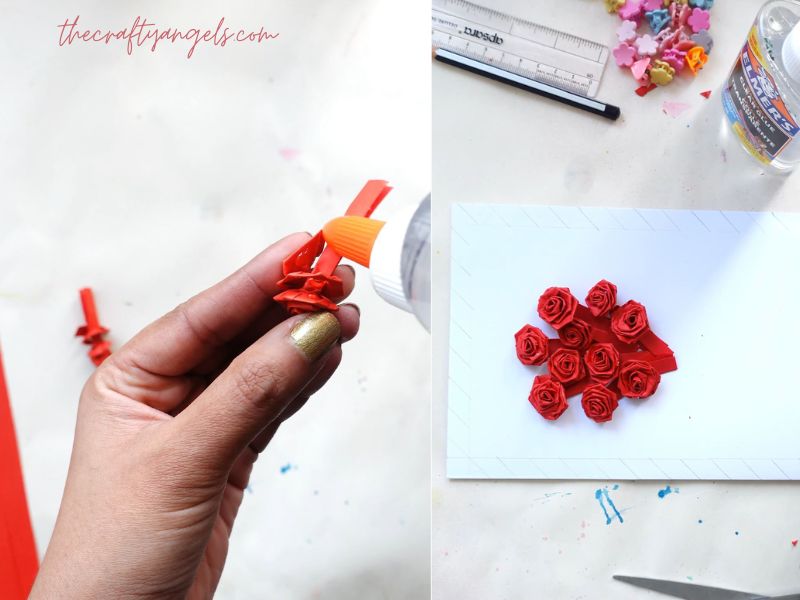
- Fold your cardstock in half to create an A5 card base.
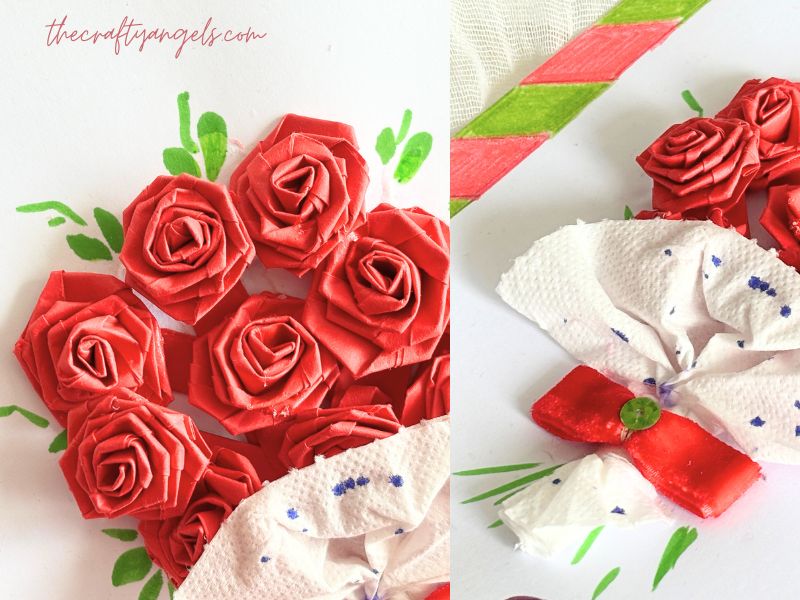
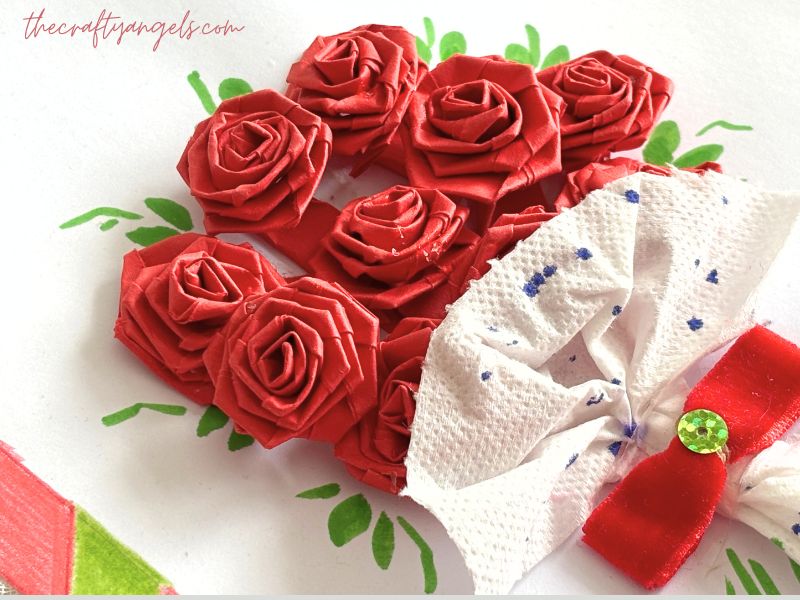
- Arrange your paper roses in a bouquet shape on the card, adjusting until you’re happy with the layout. Once you’re satisfied, glue each rose securely in place.
- To cover the bottom of the bouquet and make it look tidy, fold a small piece of tissue paper into a butterfly shape and glue it at the base. This adds a lovely touch of texture. For extra charm, tie or glue a small bow over the tissue wrap.
Step 4: Adding Finishing Touches to Your Mother’s Day Card
A beautiful card is all about the details! Here’s how to bring your DIY Mother’s Day card with paper roses to life:
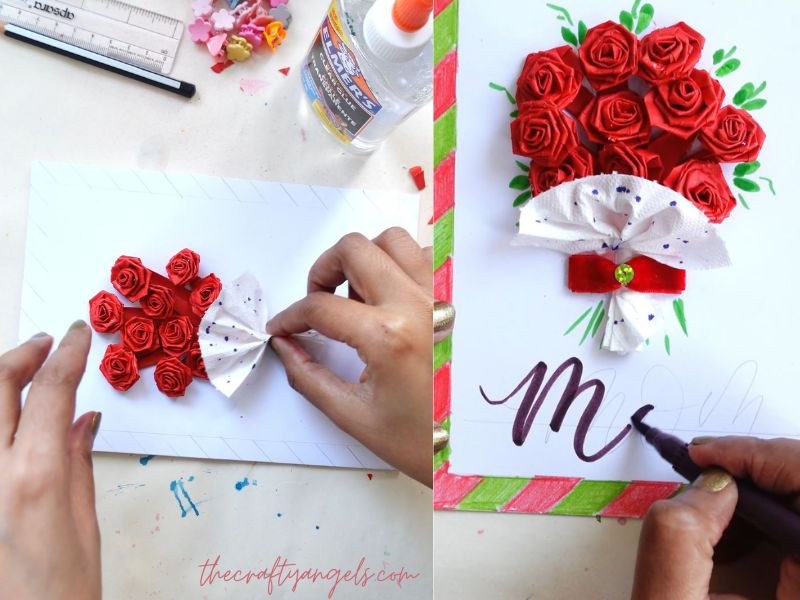
- Decorative Border: I love using borders to frame my designs. For this card, I created a border with alternating red and green colors to complement the roses and leaves. Use colored pencils or markers to draw your border—this part takes some time, but the result is totally worth it.
- Sentiment: Finish your card with a heartfelt message. I kept it simple with “Mom” written beneath the bouquet using a brush pen. If you want to explore hand lettering or calligraphy, be sure to check out my other tutorials for tips and tricks.
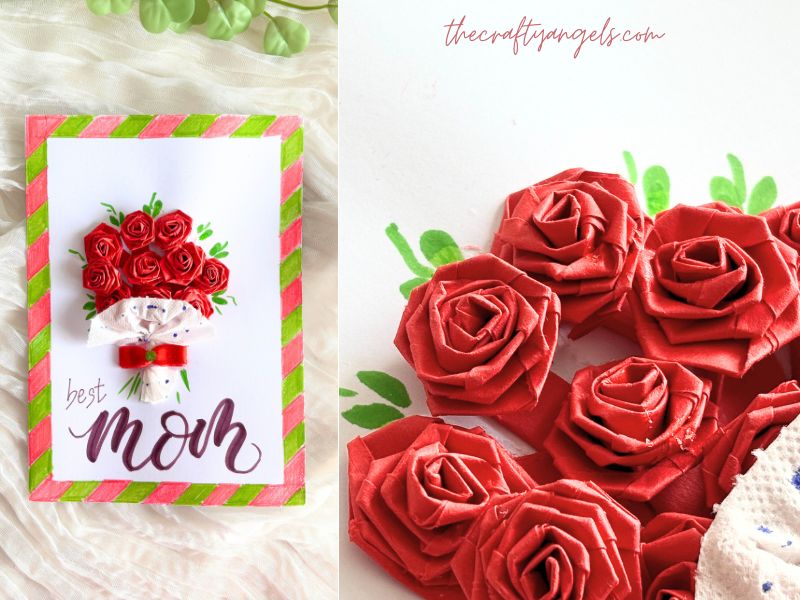
And there you have it—a gorgeous DIY Mother’s Day card with paper roses that’s bursting with love and creativity! This handmade card is a wonderful way to show your appreciation and make your mom feel extra special. Plus, the process of crafting it is relaxing and rewarding. I hope this tutorial inspires you to create your own unique version. Follow this link for more mothers day related activities. Don’t forget to share your creations with me in the comments—I’d love to see your beautiful cards. Happy Mother’s Day and happy crafting!
xoxo Angela