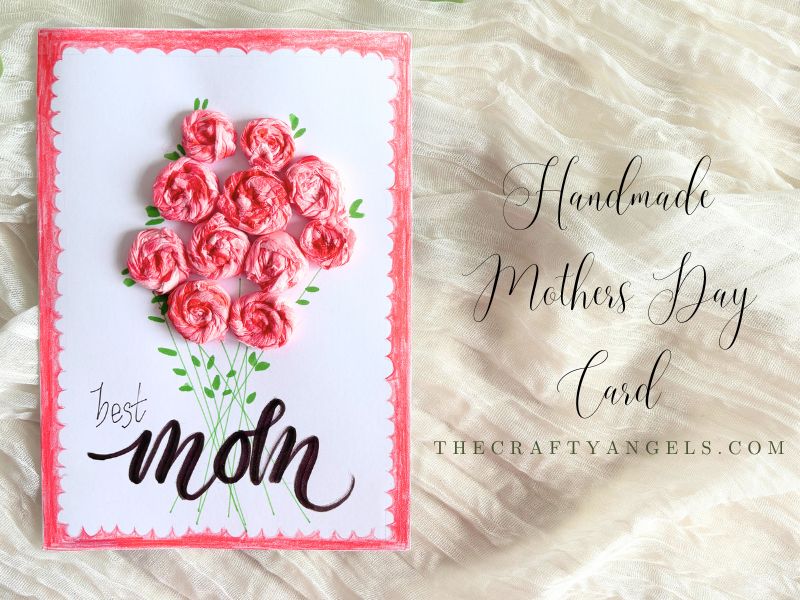
How to Make a Gorgeous Handmade Mothers Day Card (Step-by-Step)
Mother’s Day is the perfect opportunity to show Mom how much you care—and nothing says “I love you” like a handmade Mothers Day card crafted with your own two hands. In this tutorial, you’ll learn how to transform simple tissue paper strips into delicate roses, then arrange them into a beautiful bouquet on cardstock. Whether you’re a crafting newbie or a seasoned DIYer, this project is fun, affordable, and fully customizable to your mom’s favorite colors and style. I have a YouTube video for this card along with two other variants, but if you are more of a see-the-photos and wing it type of person, scroll down for a quick photo tutorial. Follow this link for more mothers day related ideas ( opens in new tab)
Materials You’ll Need for Mother’s Day card
- Lightweight tissue paper in colors of your choice
- Spray bottle filled with water tinted by a few drops of food coloring or liquid watercolor
- Liquid or acrylic paint (for added pattern)
- Scissors
- Glue gun or strong craft glue
- Clothespins or paper clips (to hold roses while drying)
- Blank cardstock or pre‑folded card
- Pencil and ruler
- Brush pens or markers (for stems, leaves, and sentiment)
- Decorative scissors or scallop‑edge punch (for the border)
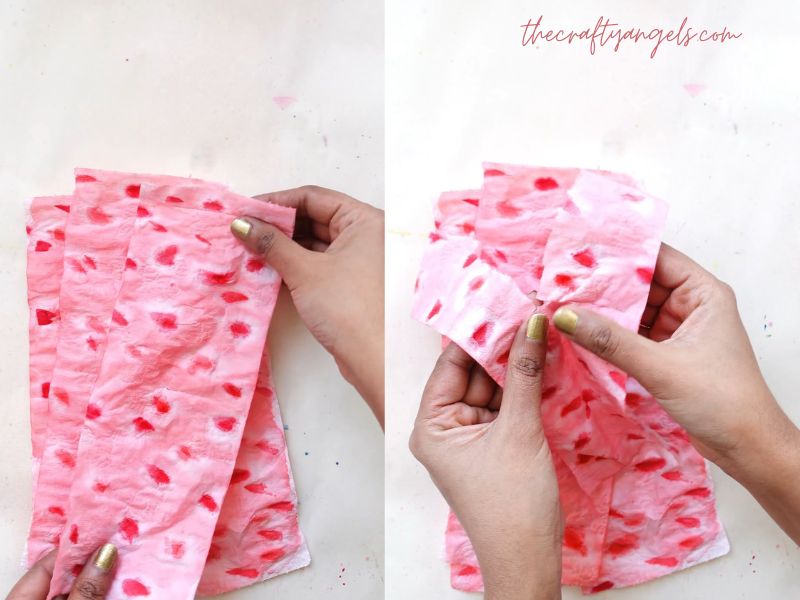
Preparing and Coloring the Tissue Paper
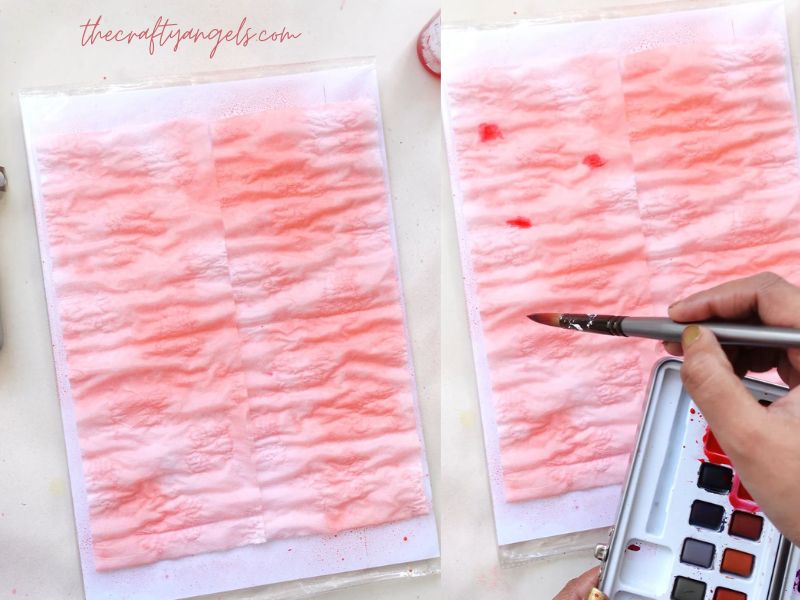
Begin by cutting your tissue paper into strips approximately 3–4 inches wide. Lay each strip flat and spritz it lightly with the colored water—enough so it’s damp but not soggy. While still wet, add a few drops of paint at random spots to create subtle patterns. Allow the strips to air‑dry until they are flexible—firm enough to hold shape but not so dry that they become stiff or tear when handled.
Forming the Tissue Paper Roses
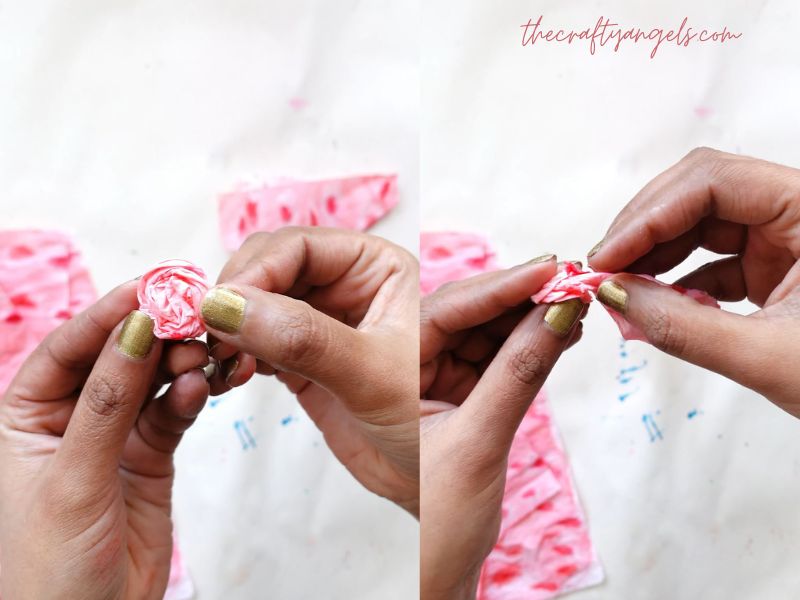
To form the roses, gently crumble a damp strip in your fingertips, then twist the center to create the bud. Wrap the remainder of the strip around the center in a circular motion, twisting slightly as you go to mimic petals.
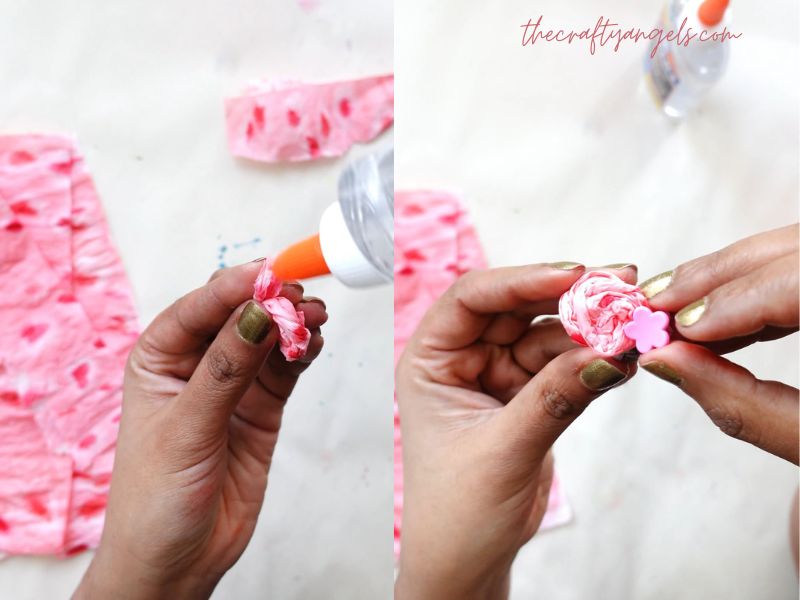
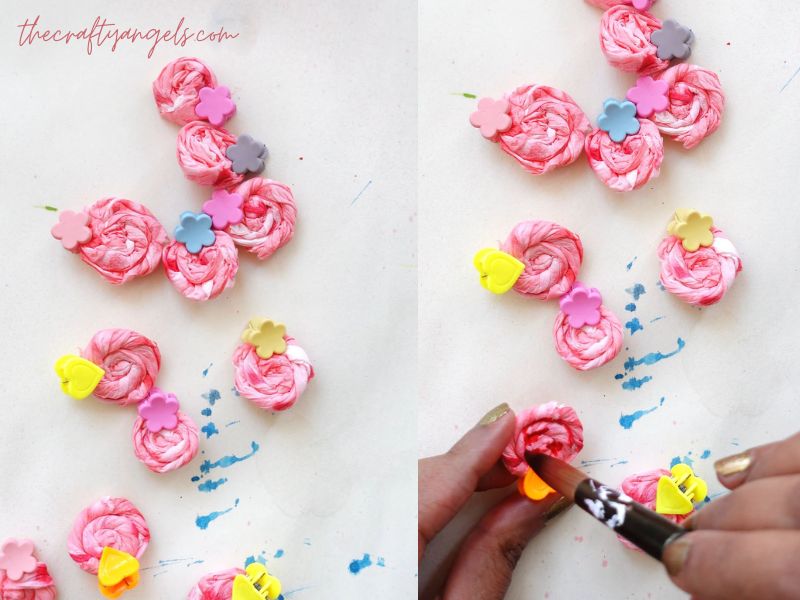
Secure the end with a dab of hot glue (or craft glue) and hold it in place with a clothespin until set. For visual interest, vary the length of your strips to produce roses of different sizes, from small buds to fuller blooms. If the paper remains slightly damp, feel free to add more paint drops for extra color variation.
Designing and Assembling the Mothers Day Card
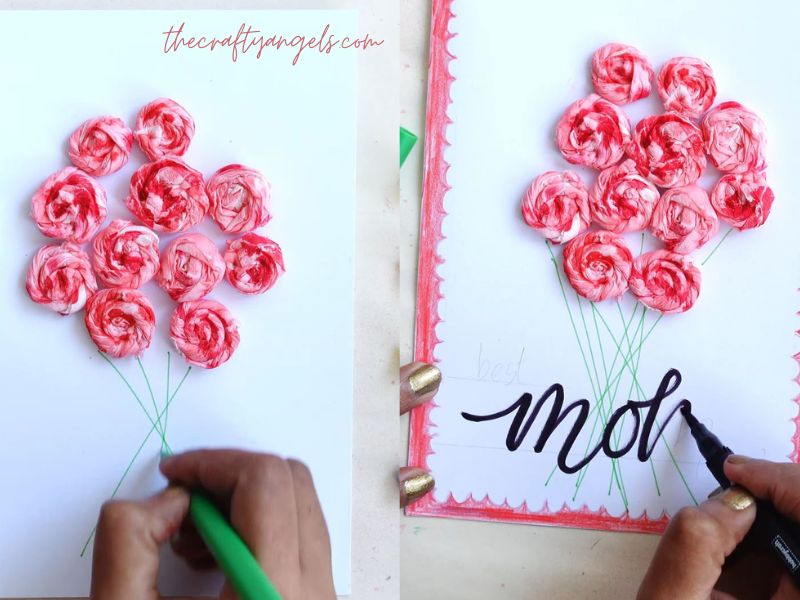
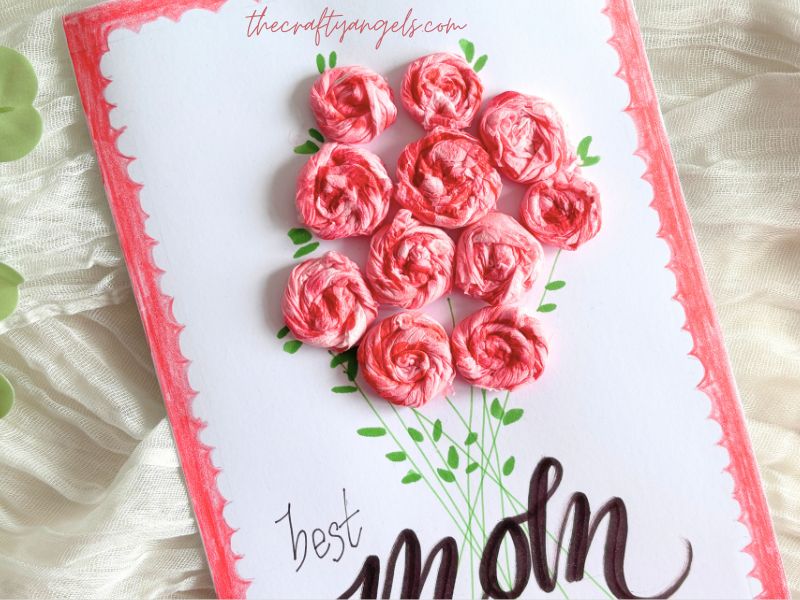
- Sketch the Layout: Plan your card layout on the blank cardstock by sketching a simple bouquet shape with a pencil.
- Add a Border: Use decorative scissors or a scallop‑edge punch to cut a coordinating border—pink scallops work beautifully—and glue this around the card front.
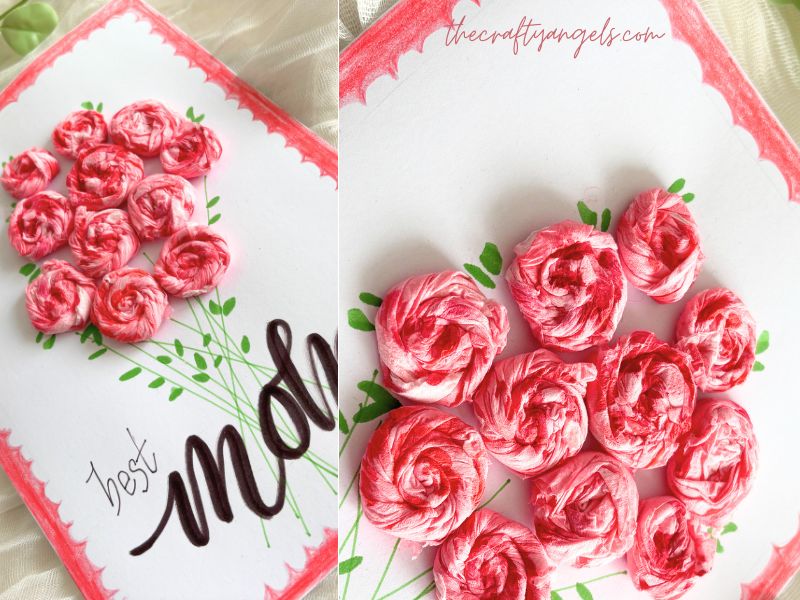
- Attach Roses: One by one, attach each tissue rose to the cardstock following your penciled arrangement.
- Draw Stems and Leaves: With brush pens or markers, draw graceful stems and leaves connecting to each rose, allowing some stems to overlap naturally.
Adding Your Sentiment to Mothers Day Card
Beneath your bouquet, write a heartfelt sentiment such as “Best Mom” or “Happy Mother’s Day” in your favorite lettering style. If you’d like to refine your calligraphy, check out my Calligraphy & Lettering Tutorial for more tips and practice ideas.

And there you have it—a charming, handmade Mother’s Day card bursting with tissue paper roses! This DIY project combines simple supplies with creative techniques to deliver a heartfelt gift your mom will treasure forever. Remember, the beauty of a handmade card lies in its imperfections and personal touches, so embrace the unique character of your creation. I can’t wait to see your tissue paper rose bouquets. Happy Mother’s Day and happy crafting!
xoxo
Angela