
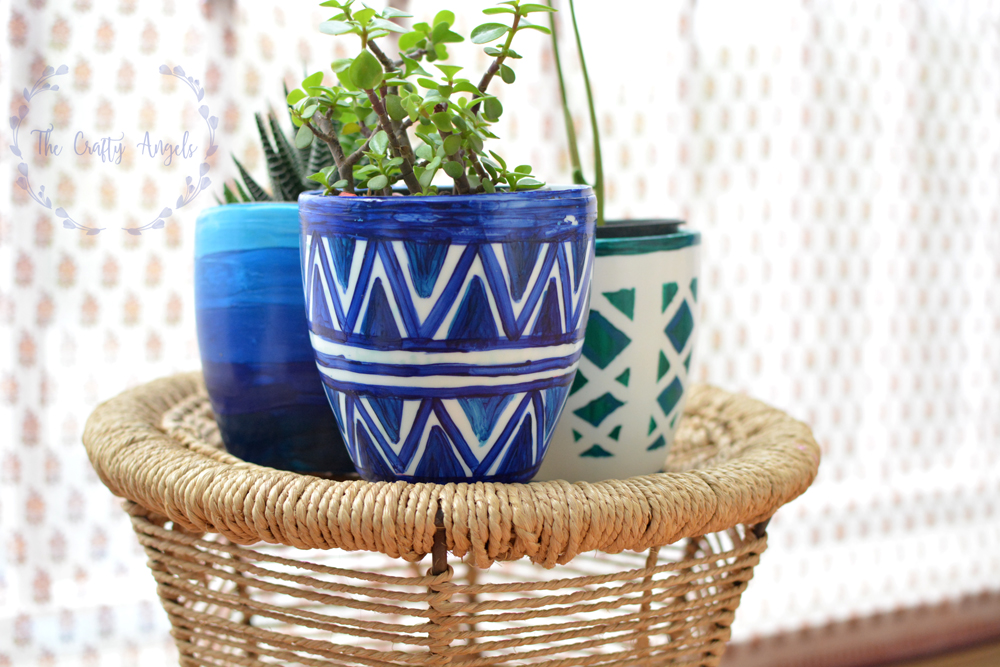
Handpainted DIY Planters you will love for your home
Have plain planters at home and want to revamp them? Handpainted DIY planters is what you must be trying to make them look like brand new one. Sharing my attempts at revamping my plain white planters today. Join along while I create this pretty planter and Oh there are videos too 🙂
Before we start, a bit of background story. So I have been a bit slow these days in bringing out posts here. Honestly, taking the blog a bit slow for the past 2 years because life has its own course and we need to balance everything right? Also at this time, ( I mean corona times – for when I am reading this post after this pandemic has all passed and we are fine) , I don’t believe this is a not going to be a productivity game or a competition to bring out maximum at-home-creative works.
Having said that, I also would like to make the official announcement that I have launched my Youtube channel – The Crafty Angels . It is right now in baby form with just 4-5 videos but then better late than never right.
Anyways, without further adieu, lets get started with this blog on handpainted DIY planter pots.
Materials required for making handpainted DIY Planters Pots :
- Plain/Old pots
- Acrylic paints in shades of blue/green
- Washi tapes
- Paint brushes
- Varnish
Lets get started with the Creative indoor planter DIY then !
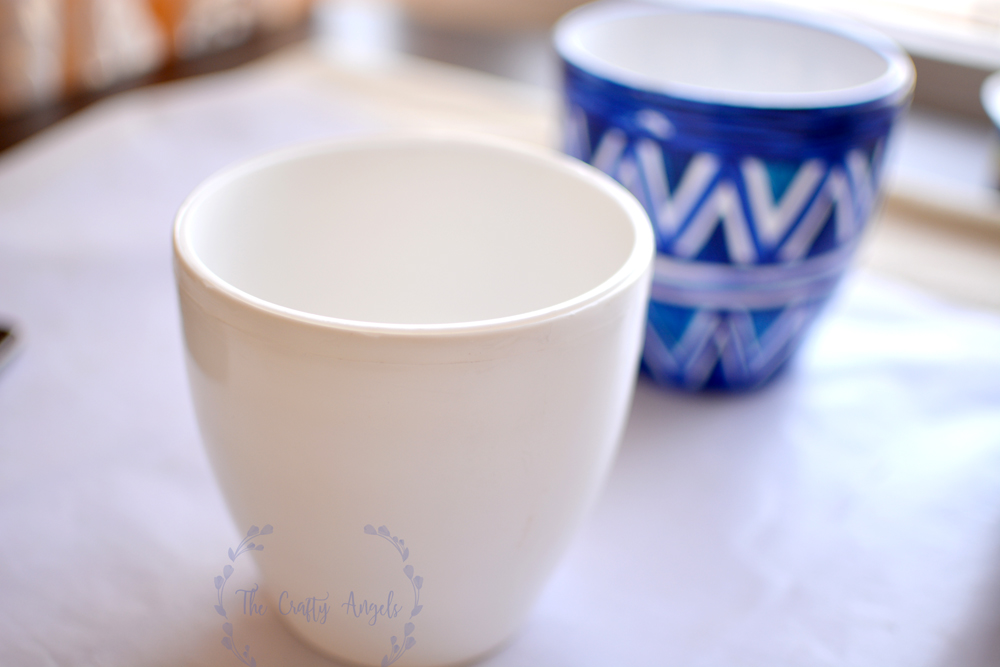
Lets start with the DIY then. If you do not find the exact same supplies, feel free to use whatever you have in your hand. So bring out all the pots that are plain and boring. Can be terracota pot or black or white, anything under the sun! Paint them first with white most preferably white gesso, which will adhere well to a any surface, but you can also use chalk/acrylic paints as well.
So lets first start with the pattern, I decided to have diamond shapes in green and blue shades. For this, I first put on the washi tapes in my desired pattern . I put the wider washi tape vertically and then worked with the thinner washi tape in criss cross design.
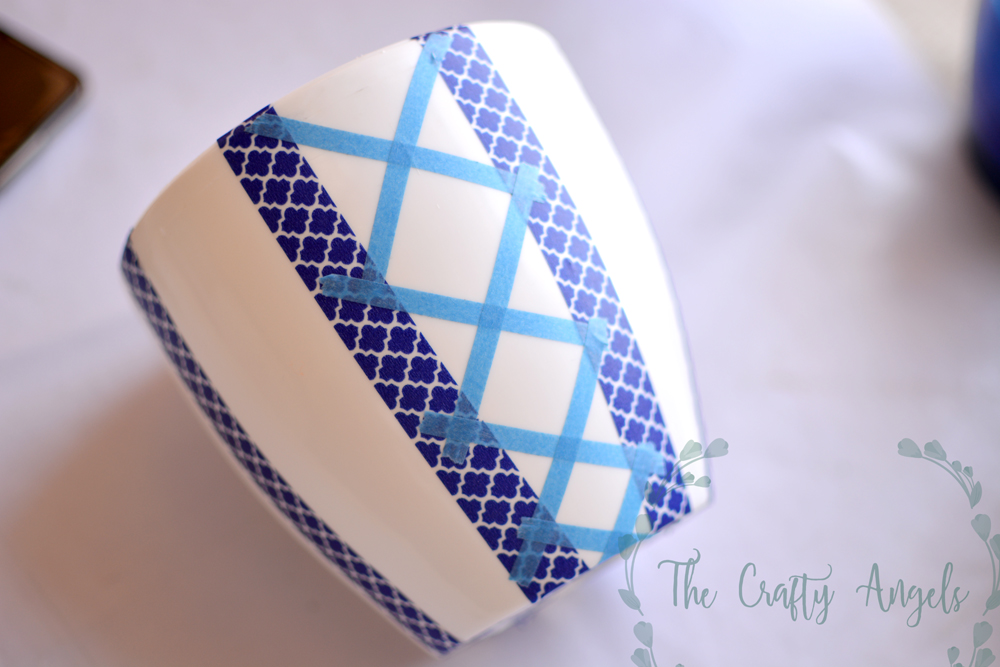
I repeated the same design at equal intervals to cover the entire surface of the pot.

Once the pattern with washi tape is done, press the tape firmly to the surface to ensure that clear edges once you remove the tape. Load your brush with little paint and then start coloring in the areas where you want the paint. I went ahead with peacock green shade in all the exposed areas and waited for the first layer to dry. One tip when you paint is to take as much little paint as possible on the brush instead of loading it with too much. This helps in the paint not peeling off just like when you paint your nails with too much paint!
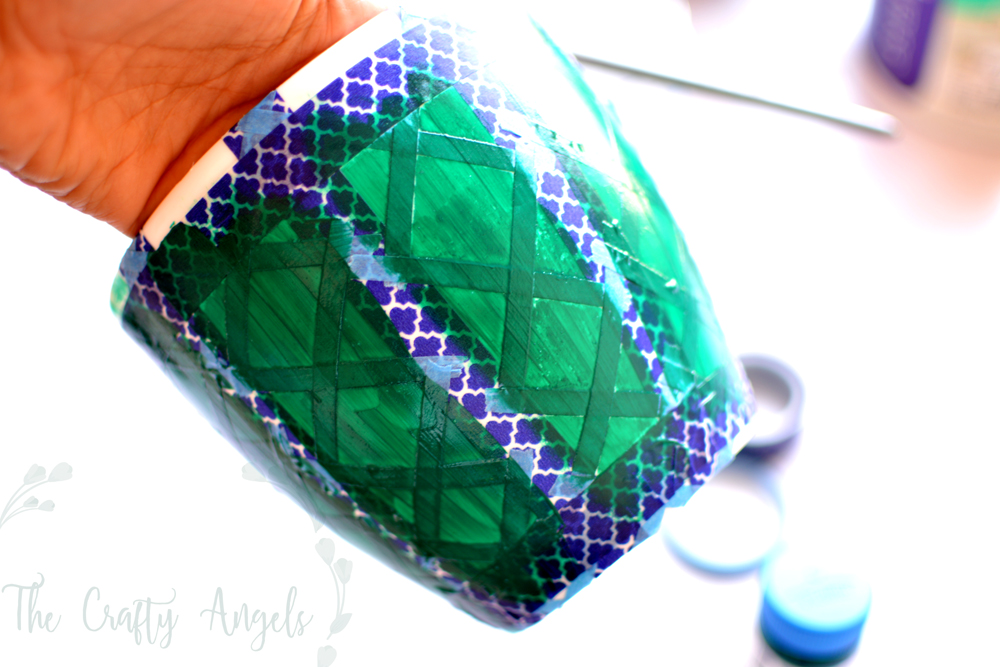
Once the first layer was completely dry, I went ahead and applied blue shades only along the edges of the washi tapes so that when the tapes are removed, I will be left with blue edges green diamond shapes.
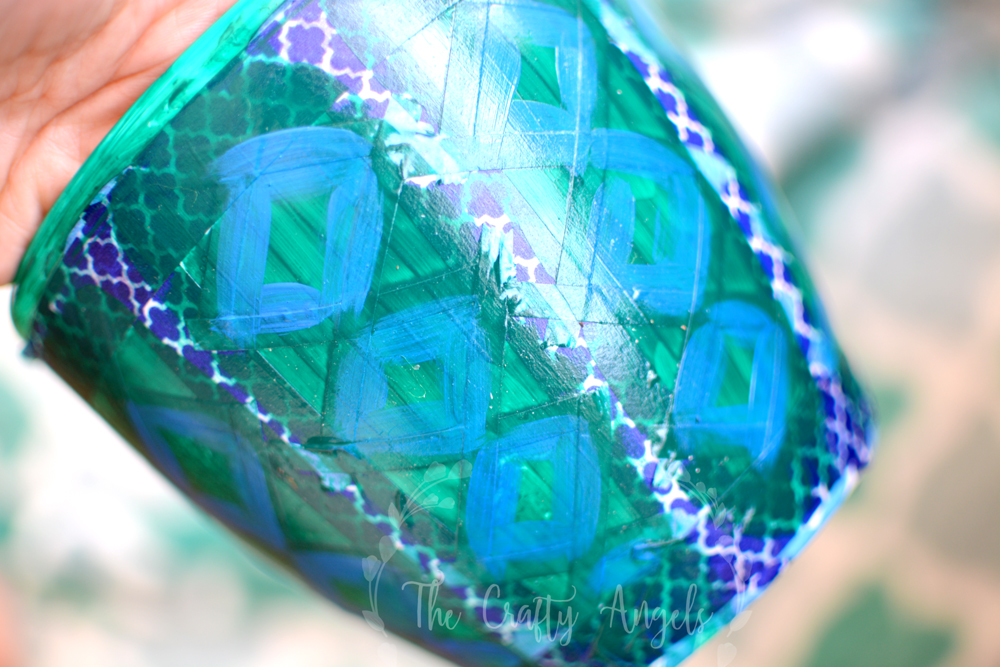
You can peel the washi tape when the paint is still wet or dry. I peeled then off when it was dry and it worked well. Just make sure that when you peel, roll the tape over the surface instead of pulling it at 90degree from surface.
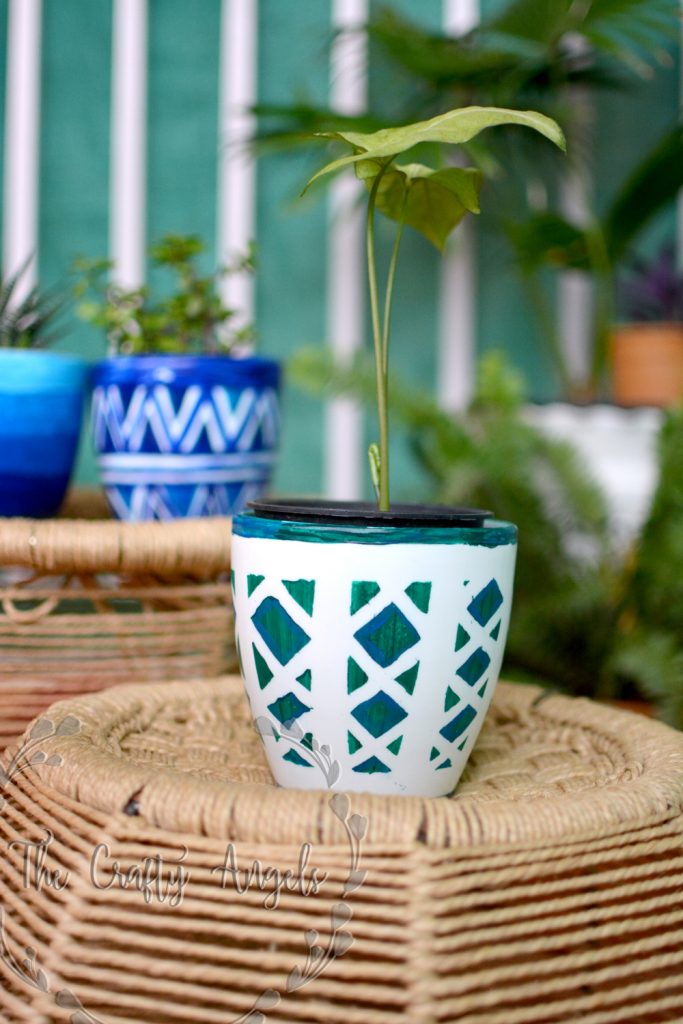
Removed the washi tapes and tadaaa! The pretty planter is up. Whenever you want to revamp your old planters or ones that are black ones, this is the simplest and easiest trick. Washi tapes in different patterns and you have a million different patterns 🙂
Along with this planter, I also revamped two other planters, in shades of blue but in different ways. I have made a youtube video on painting the rest of the two planters and I would be really happy if you guys watch the video and give it a thumbs up 🙂
Well, so I hope you try this and also let me know how this one turned out for you. Cant wait to see how you created them 🙂 Until next time, when I turn up with another DIY, its bbye 🙂
xoxo Angela


Your painting is looking very cool and fabulous on Pots. I am a handicraft manufacturers so I can understand its beauty.
Visit: https://stoneandwoods.com/
That is a fantastic blog post. Nice tips & details have been given for creating arts & crafts projects at home with utmost ease. All the steps & tips you have specified in the above article are very informational and less time-consuming. This post will help even novices in instructing them from the beginning.